There are several GUI frameworks that one can use when working with Python; one of the most actively developed and widely supported is PyQt (now PyQt5).
Qt is a cross-platform (Windows, Linux, OS X, Android and others) application framework - it does more than generate UI widgets and dialogs, but that is one of it’s biggest use scenarios.
Qt has been developed by several companies (Trolltech, Nokia, Digia), and as a result is a very mature library with a large user-base.
As mentioned, Qt does much more than creating GUI elements, including Networking, Multimedia, SQL (database), and Webkit (web content rendering), with add-on modules for things like Bluetooth and NFC, Hardware sensors, and GPS positioning service access.
"C:\WinPython")Tadaaaa!!
This is the kind of application that can be written with PyQt. In fact, even the Matplotlib plot windows that you have been using use PyQt (and it is possible to embed these “widgets” in bigger PyQt applications).
There are many other examples - see here for a few : https://wiki.python.org/moin/PyQt/SomeExistingApplications .
We will focus on using Qt for relatively simple GUI creation tasks for now though!
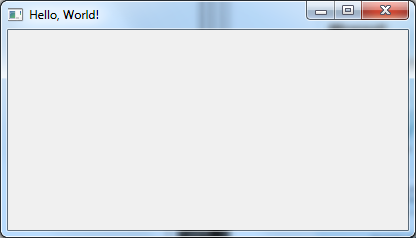
We will begin by creating a simple Hello, World program.
The main component of any PyQt5 application is the QApplication object. Usually this is passed
command-line arguments using sys.argv:
import sys
from PyQt5.QtWidgets import QApplication

app = QApplication(sys.argv)
Next we create all windows, dialogues etc, and then call app.exec_()
(often wrapped in sys.exit to capture the return code):
import sys
from PyQt5.QtWidgets import QApplication, QWidget

app = QApplication(sys.argv)

w = QWidget()
w.resize(400, 200)
w.setWindowTitle("Hello, World!")
w.show()

sys.exit( app.exec_() )
What happened here? PyQt (and the underlying Qt C++ library) work with classes, and GUI elements are connected with an event-driven interface using “signals” and “slots”.
What we did in the code above is to
show the widgetexec_ on our application object.However, before we start learning about writing custom file saving dialog, or colour selection widget, be aware that common dialogs like these have already been created for us!
Along with simple message and warning boxes, Qt provides very simple ways to get a file name or file list from the user as well as colour, time, and others like Font selection input, and progress.
QFileDialogAs an example of how easy using one of these dialogs can be, consider the case of wanting to get a file name from the user, for an existing file that will then be opened by the program.
It turns out that this is a simple “one-liner” in PyQt5 (after imports and creating the
QApplication object).
from PyQt5.QtWidgets import QApplication, QFileDialog

app = QApplication([])
# NOTE: This time we don't need to start the event loop!
filename = QWidgets.QFileDialog.getOpenFileName()
or, adding a little more customization,
from PyQt5.QtWidgets import QApplication, QFileDialog

app = QApplication([])
filename = QtWidgets.QFileDialog.getOpenFileName(None, "Select Image file", "", "Images (*.tif)")
Note
While it’s not immediately apparent, this code exposes an additional intricacy related to classes/objects. We didn’t have to create a QFileDialog object, in order to be able to use
getOpenFileNamewhich is a member function of the QFileDialog class. This is becausegetOpenFileNameis a special type of member function, called a static member function. Roughly speaking, unlike a normal member function that has access to object data (remember an object is an instance of a class), static member functions operate at the class level, meaning that they don’t have access to any object-specific data.
Try and find out how to create a dialog that show’s a typical “select folder” interface (which we might use for example to get a user to select the output destination for a script).
Once the output folder has been selected, create a simple text file in the folder called
dummy_data.txt, containing the text "Hello! I'm a dummy data file!"
Our Hello World example contained some of the most basic elements of a QT application; the QApplication object and a simple widget. However, most of the time we want to use common widgets like buttons and text areas. Most of these are predefined in QT, and we will list some below.
Before we do however, let’s quickly learn about how these widgets are going to talk to each other and actually do stuff!
In the QT framework, when a button is pressed, or a text field edited, a signal is emitted by the corresponding widget.
To get our application to do something when that signal is emitted, we need to connect the signal to a slot.
Let’s see how this is done in our first example of adding a GUI element.
Now that we can display a simple dialog, it’s time to add in some simple GUI elements (aka widgets).
import sys
from PyQt5.QtWidgets import QApplication, QPushButton

app = QApplication(sys.argv)

w = QPushButton("Press me")
w.resize(400, 200)
w.setWindowTitle("button")
w.show()

def my_first_slot():
    print("I got clicked!")

w.clicked.connect(my_first_slot)

sys.exit( app.exec_() )
As we can see we replaced the QWidget with a QPushButton instance.
Also as mentioned in the section above on signals and slots, we added
a function to act as a slot which we then connected to the
QPushButton’s clicked signal, by calling clicked.connect on the
QPushButton object, and passing the function we want to be the slot
as the first argument.
The QPushButton object’s most commonly used (built-in) signal is clicked for
when the button is clicked; others include pressed for when the button is
pressed down, and released when the button is released.
For more details about signals and slots in general, see here:
http://pyqt.sourceforge.net/Docs/PyQt5/signals_slots.html
The full list of class functions etc for the QPushButton can be found here http://doc.qt.io/qt-5/qpushbutton.html
NOTE
The PyQt5 documentation mainly links to the Qt5 (C++) documentation, as PyQt5 simply “wraps” the C++ library. This means that most of the C++ functions and classes are “roughly the same” as the Python versions.
import sys
from PyQt5.QtWidgets import QApplication, QLineEdit

app = QApplication(sys.argv)

w = QLineEdit("I can be edited!")
w.setWindowTitle("line edit")
w.show()

def show_change(text):
    print("CHANGED: ", text)

w.textChanged.connect(show_change)

sys.exit( app.exec_() )
A list box (QListBox) displays a list of data that can be selected,
while a select box QComboBox shows a button which when clicked
presents a drop-down list.
Sliders (QSlider) and spinners (QSpinBox) are used to set numerical data; both have
minimum and maximum values, though spinners also (optionally) allow arbitrary number input.
A progress bar (QProgressBar) is a visual feedback of the progress of a processes; we’ve doubtlessly
all spent some amount of time watching little bars filling!
QProgressBars can be determinate (ie showing a concrete value) or indeterminate, in which case the indicator slides back
and fore to indicate that the exact progress is unknown.
So far we have shown single widgets in their own windows. However, most User Interfaces have more complex layouts.
Laying out widgets in Qt can be achieved in one of two main ways
For small to medium complexity layout projects, coding the layout directly is often faster than using the layout designer, and we will focus on this approach here.
While we can position widgets using “absolute positioning” within a dialog, this is not usually recommended as e.g. resizing the dialog will result in a strange looking layout.
Instead, using “layouts” is preferred, as these automate much of the positioning, and reposition widgets if the window is resized.
The two most basic layouts are horizontal (QHBoxLayout) and veritcally (QVBoxLayout) aligned widgets.
Note that layouts can be nested, meaning that the first item in a vertical layout can be a horizontal layout etc.
In order to create a grid of widgets, Qt provides a useful QGridLayout class.
Even more advanced layouts are possible through the use of e.g. the QMainWindow class, which provides a main widget area, a menu area, toolbar area etc.
Instead of telling you to build some dialog with widgets and functionality that has no relevance to you, try and think of a simple(ish) GUI project to get started with PyQt; if you’re struggling for inspiration, start off by copying and slightly editing the examples listed above.
If you’re really stuck, then try the following:
NOTE: you will need matplotlib.interactive(True) in order to use Matplotlib
with PyQt (it stops Matplotlib trying to start it’s own event loop!).