You should already be familiar with basic Python including
list, dict)if-else, for, etcIf you are unclear on any of these points, please refer back to the introductory notes.
We will now focus on some additional, sometimes Python-specific, concepts. By this I mean that even if you know how to program in C or Fortran, you will possiby not know for example what a list comprehension is!
Less “universally useful” additional Python concepts have been included in the optional “Additional advanced Python” section.
tryingA common programming approach in Python (as opposed to e.g. C) is to try something and catch the exception (i.e. if it fails).
This is as opposed to the approach used in other languages, which is to carefully check all inputs and not expect the exception to happen.
To do this we use a try-except block, for example
# At this point we have a variable called my_var that contains a string
try:
    num = float(my_var)
except Exception:
    # Calling float on my_var failed, it must not be a
    # string representation of a number!
    num = 0
i.e. instead of carefully inspecting the string contained my_var to determine
whether we can convert it to a number, the Pythonic approach is to simply
try and convert it to a number and handle the case that that fails in
an except block.
Note
You can technically write
try:
    ...
except:
    ...
i.e. omit the
Exception, but this is known as bare exception and will catch every possible error. AddingExceptionwill still catch almost all errors; without it, you won’t even be able to (immediately) terminate your script with ctrl-c!It is almost always best to specify exactly which type of exception you are going to try and allow to happen using
try-except.That way, if something else unexpected happens, you will be notified and Python will terminate in the usual (helpful!) way.
os and sysWe’ve already encountered os and sys in the introductory notes.
However, there are some common uses of os and sys functions that
merit special mention.
os.pathWhen, generating full file-paths, or extracting file directory locations, we could potentially use simple string manipulation functions.
For example, if we want to determine the folder of the path string
"C:\Some\Directory\Path\my_favourite_file.txt"
we might think to split the string at the backslash character “" and
return all but the last element of the resulting list (and then
put them together again).
However, not only is this tedious, but it is also then platform dependent (Linux and MacOS use forward-slashes instead of back-slashes).
Instead, it is much better to use the os.path submodule to
os.path.joinos.path.dirname or os.path.realpathos.path.splitext
amongst many more useful file path manipulation functions.sys.argvsys.argv is a list of command line arguments (starting with the
script file name) - you can access it’s elements to get command line
inputs.
To test and play with this you can simply add the lines
import sys
print(sys.argv)
to the top of any (or an empty) script, and run the script.
If you follow the script file name by (a space and then) additional words,
you will see these words appear in the terminal output as being contained in
sys.argv.
sys.argvCreate a new script (exercise_sys_argv.py) and firstly make it print out the arguments it was passed from the command line.
Next have the script try to convert all arguments (after the script filename) into numbers and print out the squares of the numbers. For any input that was not a number, have it print an message letting the user know.
Run your script with several inputs (after the script file name) to confirm it works.
import sys

print(sys.argv)


def convert_value(value, index):
    """
    Function that try-s to convert input
    to a number, or prints an error message

    Input are the value to convert, and it's index for the error message
    """
    try:
        num = float(value)
        print(num, "squared is", num**2)
    except:
        print("Could not convert value", value, "at", index, "to a number")


for index, val in enumerate(sys.argv[1:]):
    convert_value(val, index-1)
For example, running python exercise_sys_argv.py 3 4 generates
the output
['...exercise_sys_argv.py', '3', '4']
3.0 squared is 9.0
4.0 squared is 16.0
A more complete description of command line inputs is provided in the optional “additional advanced Python” section, for those requiring more information and more advanced command line input options.
Another common Python task is creating strings with formatted representations of numbers.
You should already know that the print function is good at printing out a variety of
data types for us.
Internally, it creates string representations of non-string data before printint the final
strings to the terminal.
To control that process, we often perform what is know as string formatting. To create a format string use the following special symbols in the string
"%s" will be substituted by a string"%d" will be substituted by the integer representation of a number"%f" will be substituted by the float representation of a numberWe can also specify additional formatting contraints in these special codes. For example to create a fixed length integer representation of a number we might use
print( "%.8d"%99 )
which outputs 00000099 to the terminal; i.e. the .8 part of the code meant : “always make the
number 8 characters long, (appending zeros as necessary).
NOTE: The new way of doing this is to use the format member function;
print("{:08d}".format(99))
though the old way also still works!
For additional format string options in the context of the newer format string method, see the
documentation here.
Comprehensions are losely speaking shorthand ways to quickly generate lists, dictionaries, or generators (see later) from relatively simple expressions.
Consider a for loop used to generate a list that holds the
squares of another list:
list1 = [10, 20, 30, 40]
list2 = []
for val in list1:
    list2.append( val * val ) # or equivalently val ** 2
The last 3 lines can be neatly replaced using a list comprehension:
list1 = [10, 20, 30, 40]
list2 = [val*val for val in list1]
That’s it! Simple, clean, and easy to understand once you know how.
In words what this means is: “set list2 to : a new list, where the list
items are equal to val*val where val is equal to each item in list list1“.
list2 will then be equal to [100, 400, 900, 1600].
The list comprehension can work with any type of item, e.g.
list3 = ["spam", "and", "eggs"]
list4 = [ thing.capitalize() for thing in list3 ]
would set list4 equal to ["Spam", "And", "Eggs"].
Similarly you can generate a dictionary (nb. dictionaries are created with braces, aka curly brackets) comprehension
words = ['the', 'fast', 'brown', 'fox']
lengths = {word : len(word) for word in words }
(this generates the dictionary
{'the':3, 'fast':4, 'brown':5, 'fox':3} assigned to lengths)
The last example is using tuple syntax (re: tuples are defined using parentheses, aka round brackets),
list1 = [10, 20, 30, 40]
gen   = ( val * val for val in list1)
but the crucial difference is that gen is not a tuple (nor a list). It is a generator object, which we will learn about below.
Comprehensions can also include simple logic, to decide which elements
to include.
For example, if we have a list of files, we might want to filter the files
to only include files that end in a specific extension. This could be done
by adding an if section to the end of the comprehension;
# e.g. file list
file_list = ["file1.txt", "file2.py", "file3.tif", "file4.txt"]
text_files = [f for f in file_list if f.endswith("txt")]
This code would result in the variable text_files holding the list
["file1.txt", "file4.txt"] - i.e. only the strings that ended in “txt”!
Create a new script file (“exercise_comprehensions.py”) and add code to load the comma separated value data that we used in the Introductory exercises on loading data ( available here: data_exercise_reading.csv).
After opening the file, you should skip the first row as before, and then load the numerical
data for the second column (“Signal”) directly into a list,
using a list comprehension, not a for-loop.
Then use the built-in function sum (which operates on iterables) to print the sum as well
as len to print the number of elements.
You can copy the code from the introductory exercise on file reading, up to the point where you skipped the first line of the file.
After that, you only need to add 1 line to read all the data and convert it into numbers!.
In order to do so, you will need to remember that you can
iterate over a file object (e.g. for line in file_obj1).
Using e.g.
# Load data from a text (csv) file using a comprehension
# OPTIONALLY use the current script's location as the data folder, if that's where the data
import os
ROOT = os.path.realpath(os.path.dirname(__file__))

fid = open(os.path.join(ROOT, "data_exercise_reading.csv"))
# Skip the first line (ie read it but don't keep the data)
fid.readline()
# Now read just the Signal data
sig = [ int( line.split(',')[1] ) for line in fid]
fid.close()

print("Signal data loaded:")
print("N        = ", len(sig))
print("Sum      = ", sum(sig))
produces
Signal data loaded:
N        =  2000
Sum      =  199152
withA context manager is a construct to allocate a resource when you need it and handle any required cleanup operations when you’re done.
One of the most common examples of where context managers are useful in Python is reading/writting files.
Instead of
fid = open('filename.txt')
for line in fid:
    print(line)
fid.close()
we can write
with open('filename.txt') as fid:
    for line in fid:
        print(line)
Not only do we save a line of code, but we also avoid forgetting to close the file and potentially running into errors if we were to try and open the file again later in the code.
Context managers are also used in situations such as in the threading module
to lock a thread, and can in fact be added to any function or class
using contextlib.
If you’re interested in advanced uses of context managers, see e.g.
Otherwise, other than switching to using with when opening files,
you probably won’t encouter them too often!
__file__, __name__I sneakily introduced some built-in global variables during the Introductory workshop material - apologies to those of you who wondered what they were and where they came from!
The reason I used these variables (namely __file__ and __name__),
was to make things easier with respect to accessing the current script’s
file name, and creating a section of code that would only run if the script
was being run as a script (i.e. not being imported to another script),
respectively.
Firstly a note about naming; the built-in variables are named using two
leading and trailing underscores (__), which in Python is the convention
for letting other developers know that they shouldn’t change a variable.
This is because other modules and functions will likely also make use of these variables, so if you change their values, you might break these other modules and functions!
To recap, two commonly used built-in global variables:
__file__ : holds the name of the currently executing script__name__ : holds the name of the current module (or the value
"__main__" if the script is run as a script - making it useful for
adding a script-running-only section of code)You have already used modules in Python. To recap; a module is a library of related functions which can be imported into a script to access those functions.
Using a module, e.g. the build-in os module to access operating-system
related functionality, is as simple as adding
import os
to the top of your script.
Then, a module function is accessed using the dot (“.”) notation:
os.listdir()
would for example return the directory listing for the current working directory.
However, you have also seen dot notation used when accessing functions that we’ve referred to as member functions. A member function refers to a function that belongs to an object.
For example, the built-in function open returns a file object.
This file object has member functions such as readlines which is
used to read the entire contents the file into a list.
The reason we are talking about objects is to stress the difference
between a module function like os.listdir, and a member function
e.g.
the_best_file = open("experiment99.txt")
data = the_best_file.readlines()
Another example of a member function that we’ve already used is
append, which is a member function of list objects.
E.g. we saw
list_out = []  # Here we create a list object
for val in list_in:
    list_out.append(val*val)    # Here we call the member-function "append"
As long as we are happy that there are modules which are collections of functions, and independently there are objects which roughly speaking “have associated data but also have member functions”, we’re ready to start learning about one of the most important libraries available to researchers, Numpy.
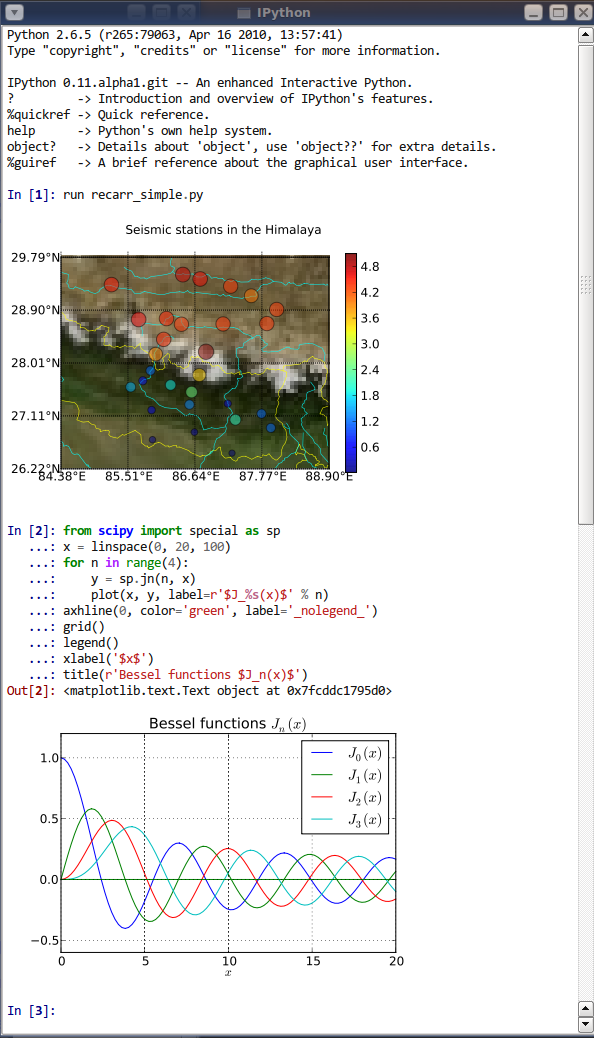
Before diving into Numpy in the next section, it’s worth drawing attention to IPython for those of you who haven’t tried it yet.
IPython (for Interactive Python) provides several tools that enhance the Python development experience.
You may have already been using IPython tools (e.g. via Spyder) without being fully aware of it.
The IPython console is an enhanced interactive Python interpreter which imrpoves on the standard interactive interpreter in a number of useful ways:
On Anaconda/WinPython this can be started by opening the IPython Qt Console application, or from a running console by launching ipython3 or jupyter-console.
If Anaconda/WinPython isn’t registered with Windows (i.e. you can’t find it in the Start Menu), you can try using the file explorer to navigate to the Anaconda/WinPython folder (possibly “C:\Anaconda” or “C:\WinPython”) and start the “IPython Qt Console” application.
NOTE The reason that both IPython and Jupyter exist is that IPython was developed first but then (largely in the form of the notebook interface - see below) a more general multi-language (including Julia, Python, R, hence the name, and many others) framework, Jupyter, branched off from the original IPython projct.
Nowadays, Ipython still exists as a Jupyter “kernel”, (amonst many others), and can still be launched via the independent ipython command.
Please note however that while IPython is a great tool it should be just that and resist the temptation to abandon writing your code in scripts!
If you try and write anything vaguely complex in the IPython console, you will quickly find yourself in a pickle when it comes to indentation levels etc, and keeping track of what you did!
In addition variables are all kept in memory making it easy to make mistakes by using a previously defined variable.
A subequent evolution of the interactive interface provided (first by IPython, now more generally by the Jupyter project) is the notebook.
This is a web interface, which provides cell-based inputs, which Maple or Mathematics users might
find familiar, coupled with inline output, including textual outputs (e.g. from print calls) as
well as inlined plots.
This mix of code and output makes notebooks very attractive for demonstrations, presentations, general teaching, as well as a host of other uses.
However, it should be stressed that while notebooks are very useful for a range of tasks, they are not a good tool for general software development.
There are multiple reasons for this including several major ones
For this exercise, instead of writing a script, you’re going to start IPython and get familiar with how to test mini-snippets of code there.
Start the IPython QtConsole, and in the interactive Python session, create variables that hold
33, 44, 55print your variables to confirm that they hold the required data.
Lastly, type the name of your variable holding the list, then a dot (.) and then press tab.
You should see IPython’s tab completions system pop-up with a list of possible methods. Append the value 66 to the end of the list.
This quick practice of IPython QtConsole operations should get you started in being able to use the console to test small snippets of code!
Launch the jupyter-notebook; a web-page showing the notebook start page should be opened for you.
Practice entering code in cells and evaluating the cells.
In particular, experiment with the %pylab inline magic.
If you would like some more exercise based on the content of this page, please download and run the accompanying notebook.