Outline
GitHub Copilot an AI coding assistant that can be ran directly within your coding environment (e.g. RStudio or VSCode). These tools should be used with care, and you still need to understand what the code does as you are ultimately responsible for your code and its output.
This walkthrough will provide the necessary steps to add Copilot to RStudio and VSCode.
Prerequisites
There are two ways of getting GitHub Copilot for free. The first is to use GitHub Copilot Free which gives you 2000 autocompletions a month.
However, the method we recommend is to get GitHub Copilot Pro free as a student or teacher. This method will also allow you to use GitHub Copilot on the RStudio servers. This susbscription gives you unlimited access to GitHub Copilot while you are a student or researcher at the University.
To do this, you will need to request GitHub Education benefits using the following steps:
- Sign up for a GitHub account (ideally using your university account)
- From your new GitHub account, apply for free GitHub Education benefits (i.e., upload photo of your Unicard)
- Once GitHub Education email to say your application is approved, head to https://github.com/settings/copilot and click the
Start free trialbutton - The next screen will have a green button to
Get access to GitHub Copilot - Finally, you just have to check policies (for additional details see here) and click
Save and complete setup - You’re now ready to set up GitHub Copilot!
Setting up Copilot in RStudio
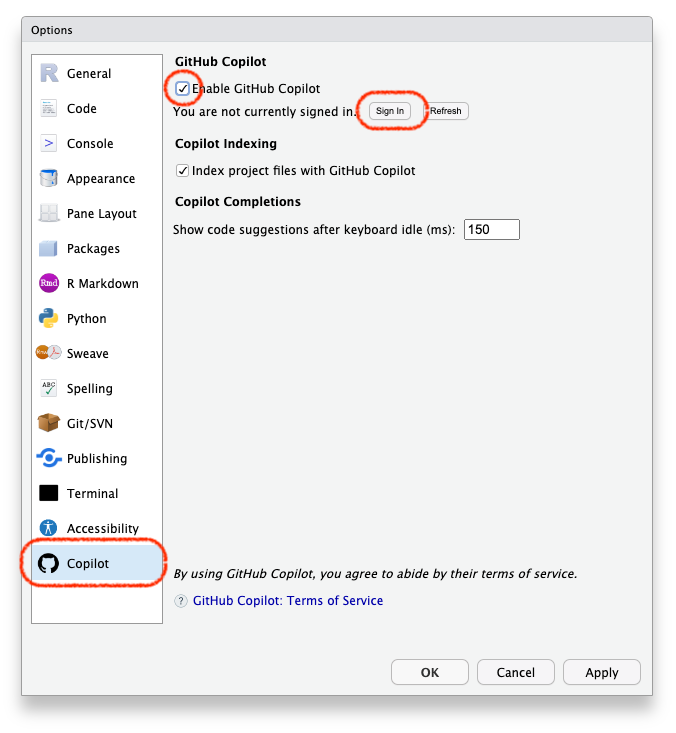
- To set up the GitHub Copilot for RStudio, we navigate to
Tools>Global Options>Copilot(see image below) - From the Copilot tab, check the
Enable Copilotbox and hitApply - You should then see a
You are not currently signed inmessage below the checkbox. Click theSign inbutton. - Copy the 8-digit code, click the link, select
Continueand paste the code - Copilot should show as activated (if not click the
Activatebutton in Copilot options) - Copilot will now provide suggestions for code as you type (you can see status in bottom right of the code window)
Setting up Copilot for Visual Studio Code
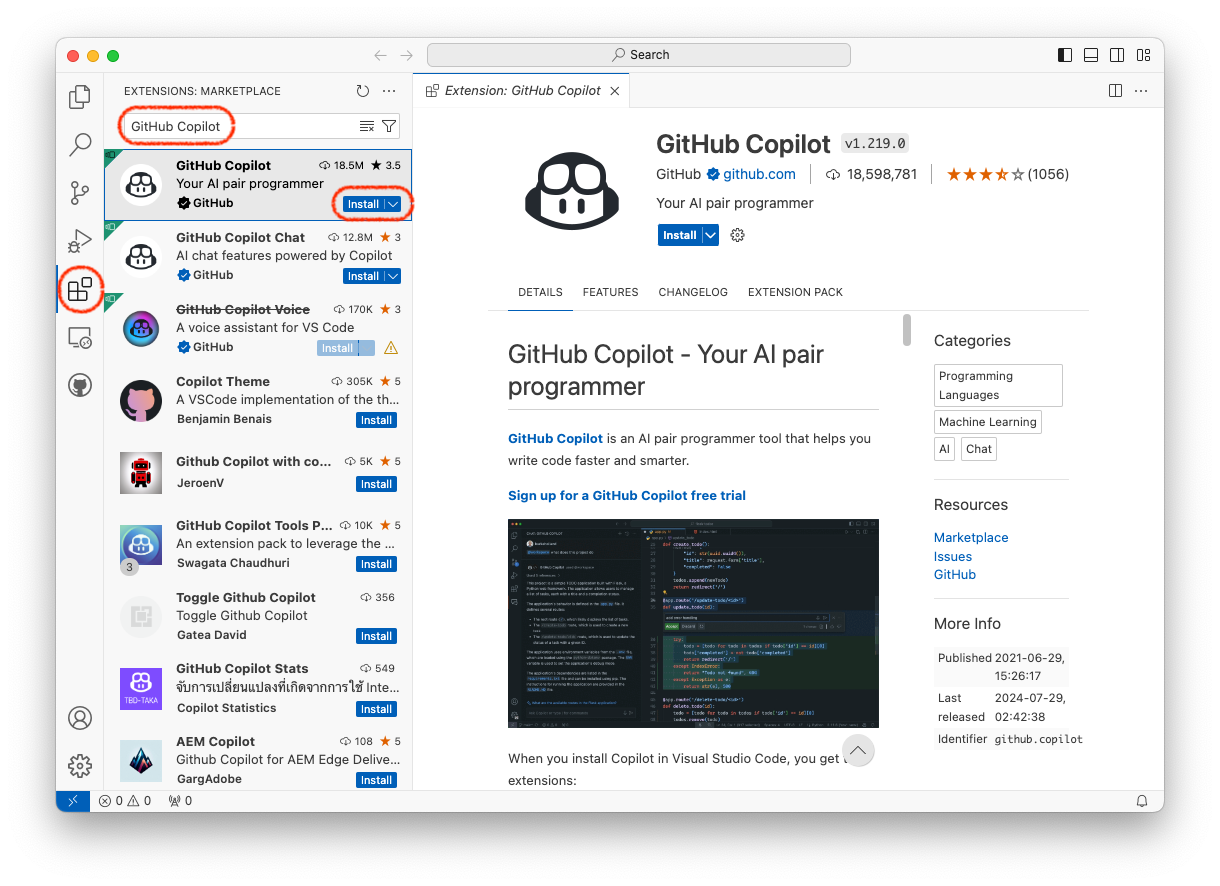
- On VSCode we just have to install the GitHub Copilot extension
- Once installed, we open the Copilot extension and use it to sign into our GitHub account
- Copilot will now give you suggestions as you type, and you can also use the additional
Copilot chatfeature (messages icon on left of window) to open a dialogue
General Copilot usage and pointers
Now we have Copilot ready to provide suggestions for our code in our chosen software!
- To approve Copilot suggestions that appear, press
Tab - To give Copilot guidance on code suggestions, provide
#code commentsthat describe steps required - Make sure to check both the generated code itself and sense-check outputs to ensure that it is doing what is expected
- The Copilot chat extension (installed automatically alongside Copilot) can be used for a broader range of tasks – see examples here
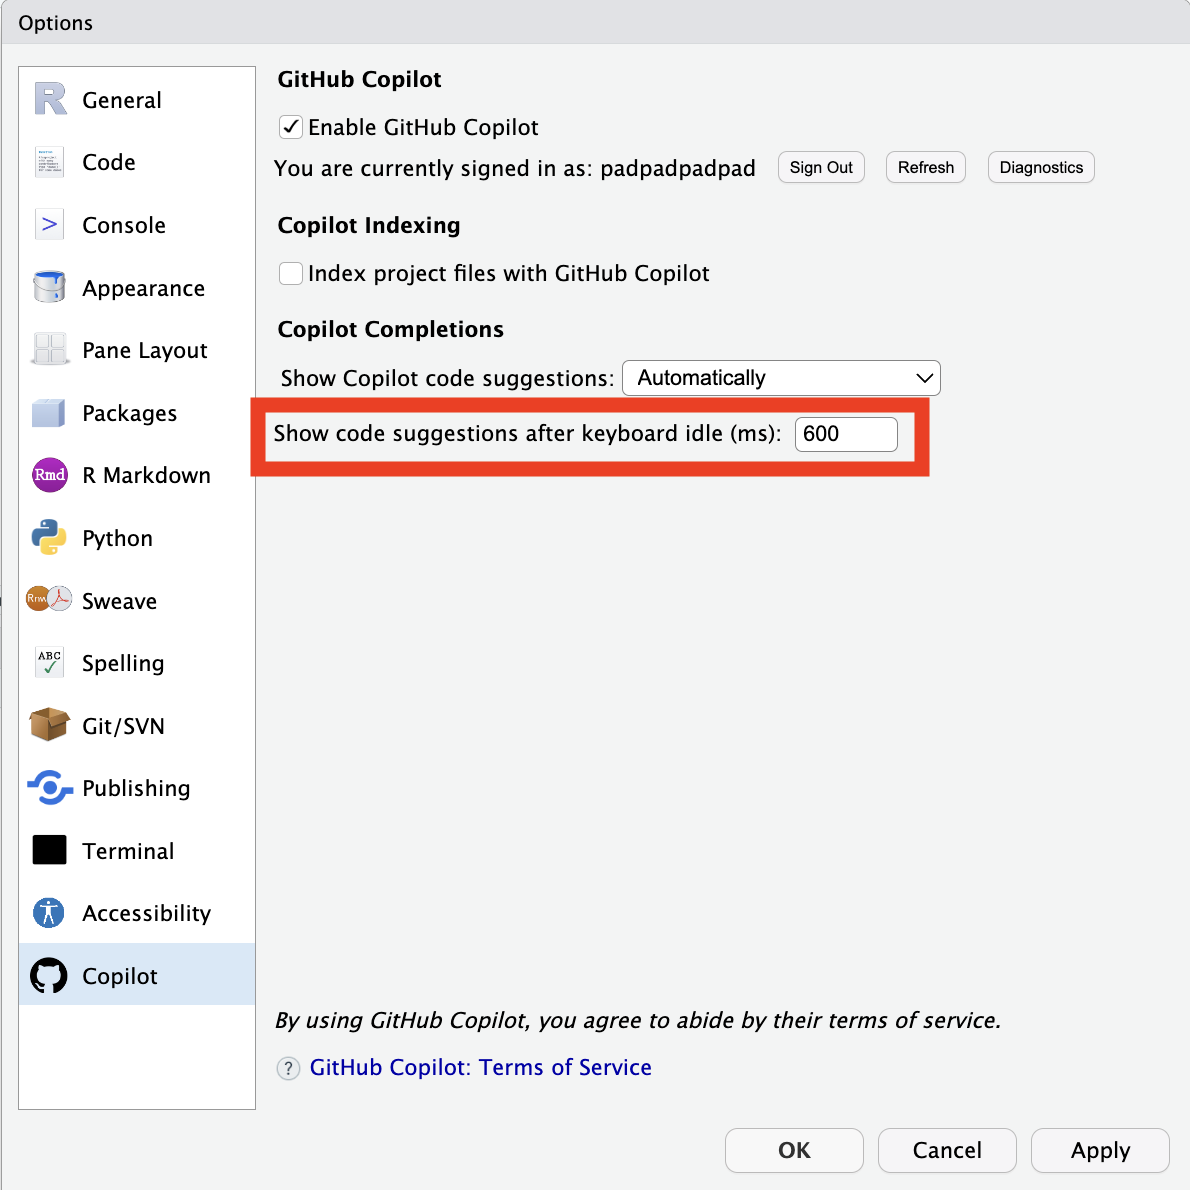
- If you also use the
Tabautocompletion capability of RStudio or VSCode to navigate files or autocomplete functions, sometimes Copilot’s suggestion comes up andTabapproves Copilot rather than the autocompletion. To stop this, you can play around with theShow code suggestions after keyboard idle (ms)in the Settings.
Additional Resources
Acknowledgements
We did not create this content alone! Inspiration, tips, and resources have been borrowed from multiple sources.